Testing With Charles Proxy Part 3
In this series of blog posts, the goal is to help someone get started testing with Charles Proxy.
The series will cover:
- What is a Proxy server?
- What is Charles Proxy and what can it do?
- How to set things up ready for testing?
- Test ideas using Charles including editing requests and responses, using breakpoints, throttling bandwidth, trigger various error codes and viewing network traffic.
Make sure to start with Testing with Charles Proxy Part 1, and Testing with Charles Proxy part 2 before going through this post.
In this post, we’ll focus on:
- Bandwidth throttling
- Test ideas using Charles where you trigger various error codes
Bandwidth Throttling
What is Bandwidth Throttling?
“Bandwidth throttling is when your ISP (Internet Service Provider) deliberately slows down your internet.”
This may happen if you have reached your monthly internet cap or you have forgotten to pay your internet bill.
Why do ISPs throttle your bandwidth?
According to NordVPN, here are the reasons why ISPs throttle your bandwidth:
- Heavy bandwidth usage may slow down internet traffic for other users in the same area, so ISPs try to curb traffic for those engaging in bandwidth-heavy activities.
- Some ISPs limit how much high-speed data you can use per month. I
- Some ISPs prioritize certain services over others and allocate greater bandwidth when you use them.
- ISPs can also throttle bandwidth to prevent server overloads and crashes if too many users connect to a single server.
As you can see, it is fairly common (or at least not unheard of) to have your bandwidth be throttled by your internet provider.
But what if you are testing and your ISP is not throttling your bandwidth AND you want to know what would happen to your users whose ISPs throttle their bandwidth?
Never fear.
Charles is here.
How to throttle your bandwidth with Charles Proxy (default setting)
Go to Proxy > Start Throttling
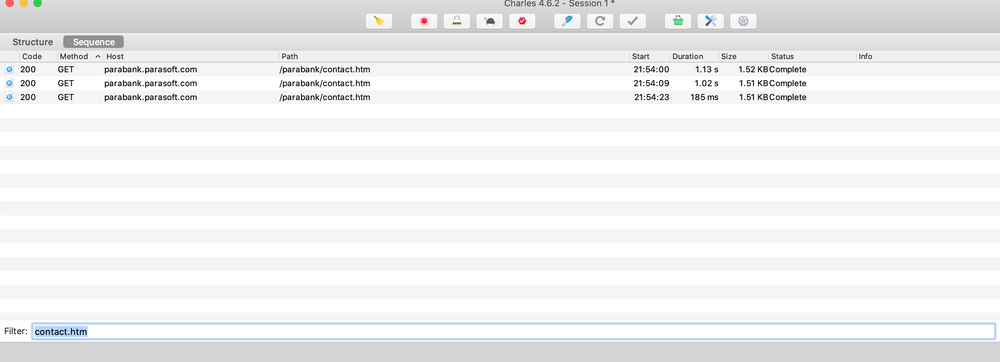
In the screenshot below you can see the difference in duration with and without throttling when loading the Contact Us page. (I went to the Contact Us page twice with throttling on, then on the 3rd request I had turned throttling off)
Using the Throttling Settings screen
Go to Proxy > Throttle Settings
If you have throttling turned off, you’ll see a screen like this:
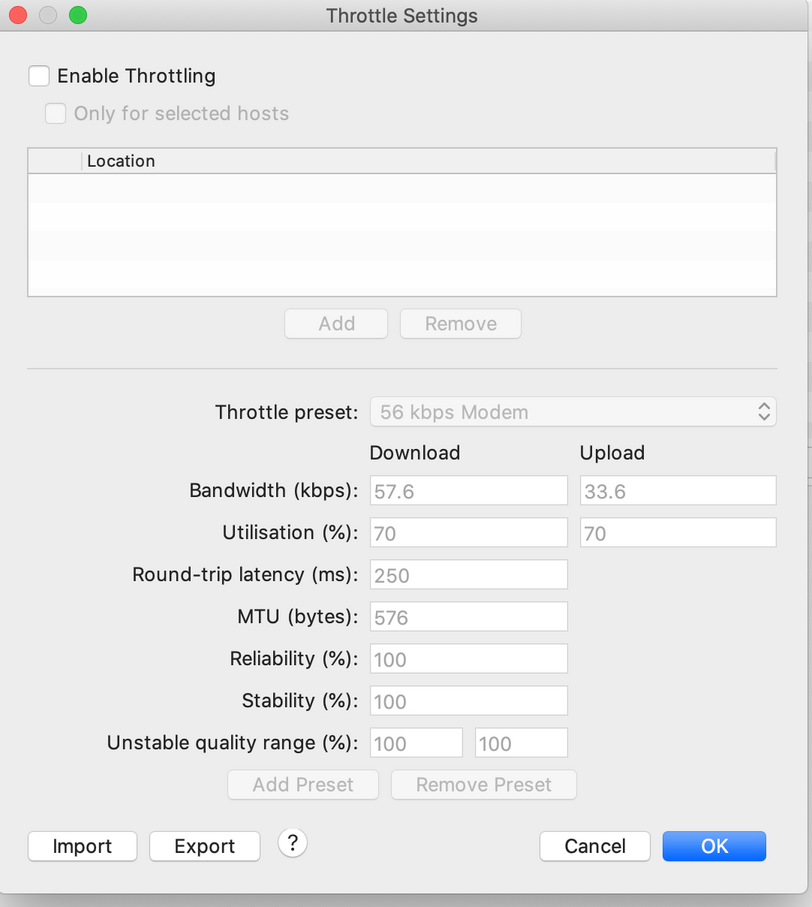
You’ll notice when you change the Throttle preset, the other fields will update.
Test ideas using Charles where you trigger various error codes
It can be hard to test how the front end will render your site when various error codes are triggered.
Charles can be helpful here.
Let’s go over some common error codes and see how our test website handles them.
What we will be doing here, will be similar to what we learned in Part 2, with editing responses. We will edit the 200 response codes and change it to the error codes.
Note: You can also use error codes to edit requests, I just tend to use it for editing responses, so that’s what we will do here.
500 Internal Server Error
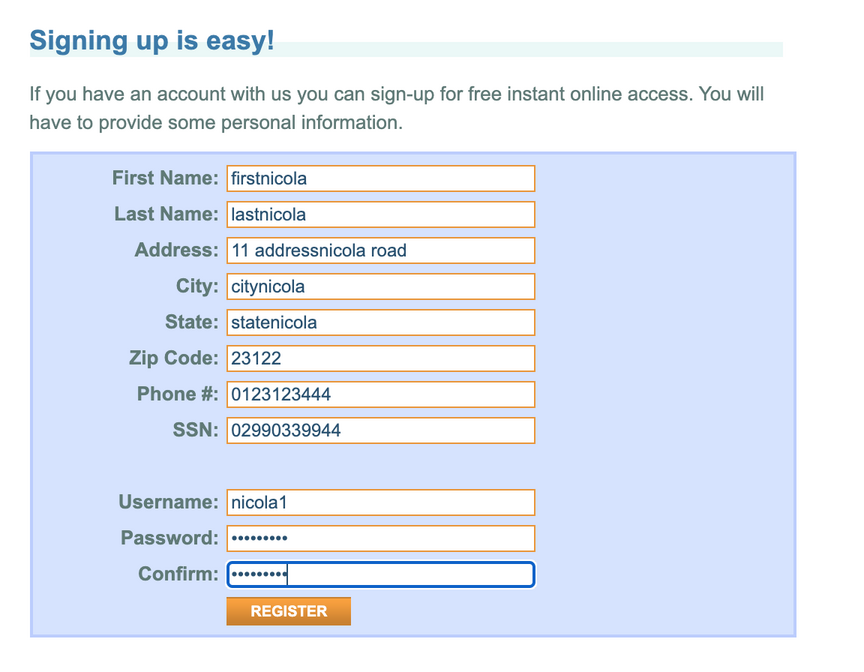
For this error we will focus on the Register screen, from the initial URL,) click on the “Register” hyperlink below the Login button (on the left hand side).
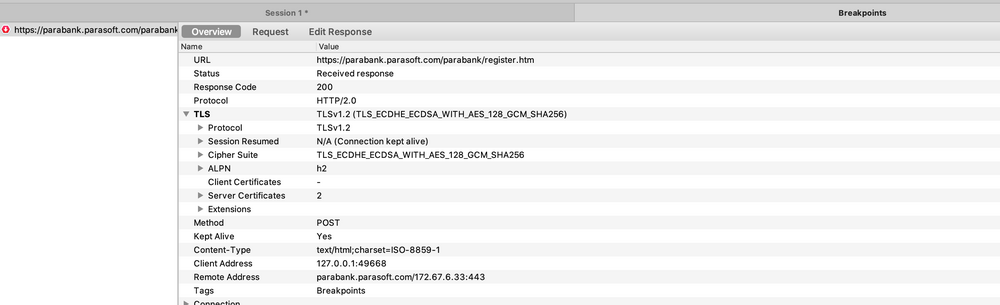
I have a breakpoint set up (see previous post for information on how to do this) that will be triggered when we get the response back from the server after sending the initial Register request.
Here is the information I submitted:
Once the breakpoint is triggered for the response, this is what I see.
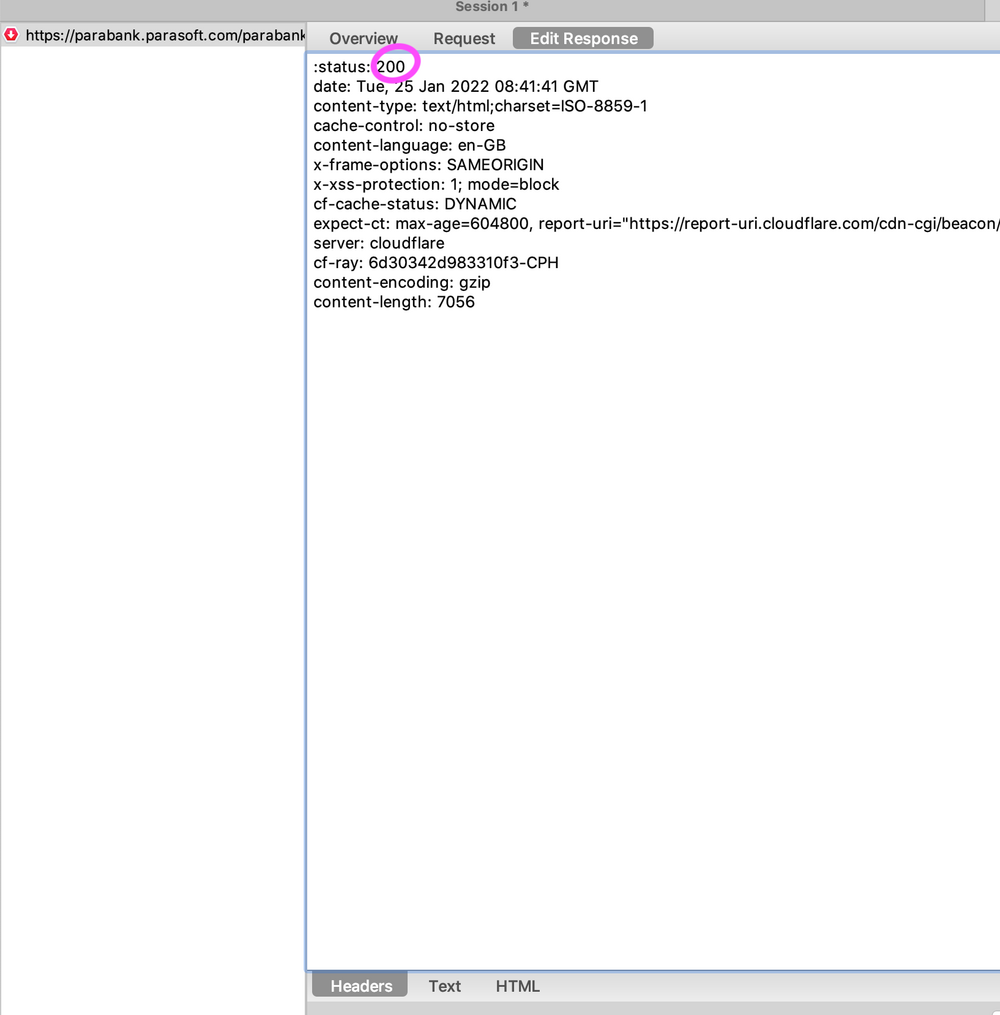
I now switch to the edit response tab and change the 200 to a 500.
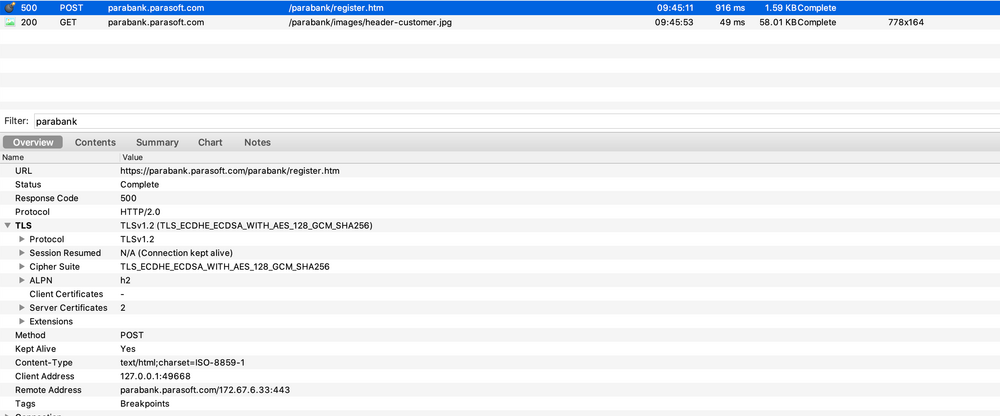
Here is how it looks afterwards in Charles.
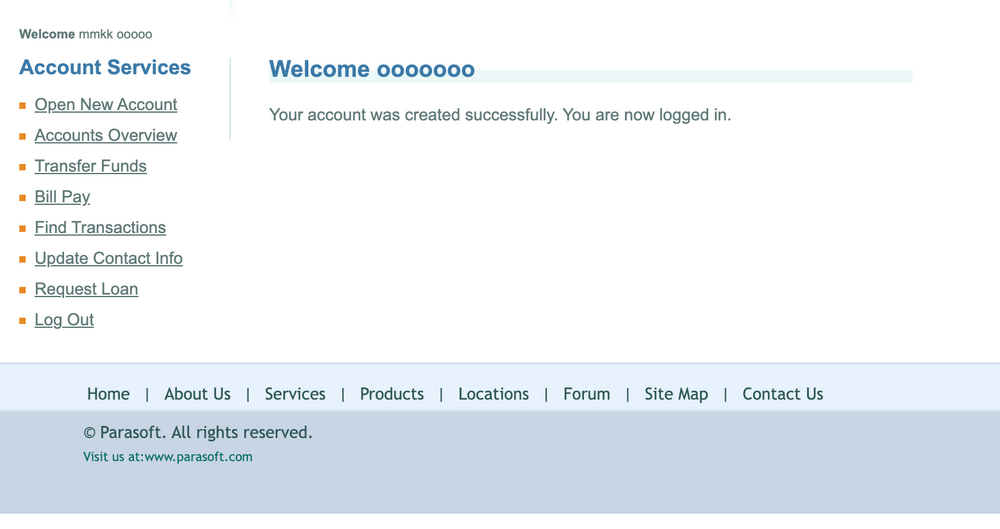
And here is how it’s rendered in the UI. (note that I forgot to take a screenshot the first time around, so ignore the username here).
Looks like some more testing is needed here!
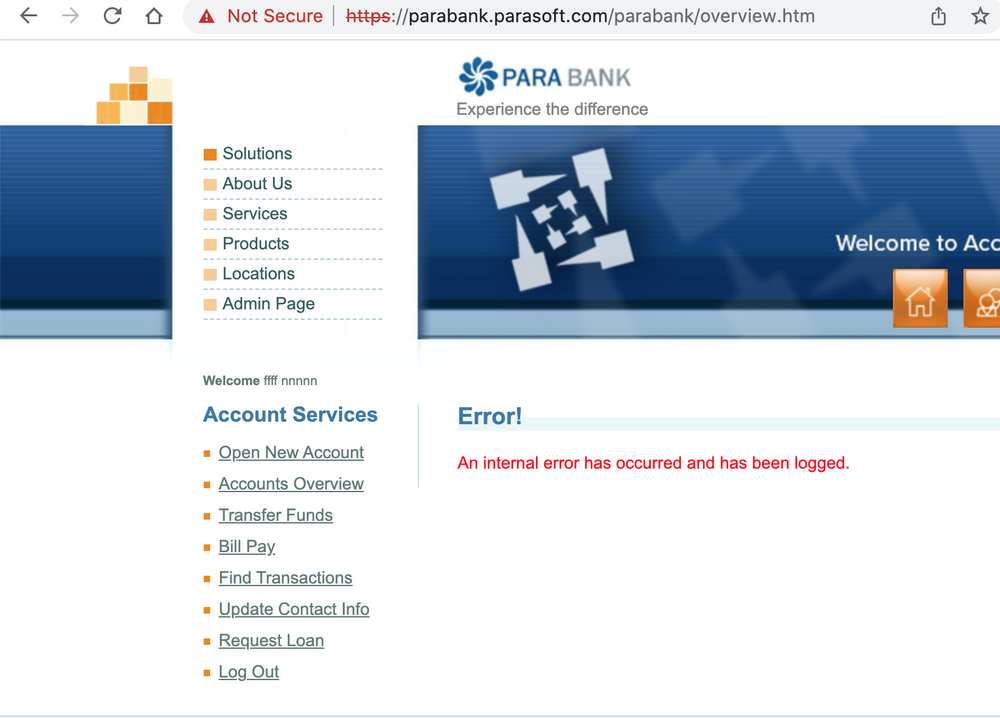
504 Gateway Timeout
Here is another example, this time we will be focussed on the Accounts Overview screen. We can access this screen once we are logged in.
Below we have changed the 200 to a 504.

Here is how it looks in Charles after the change.
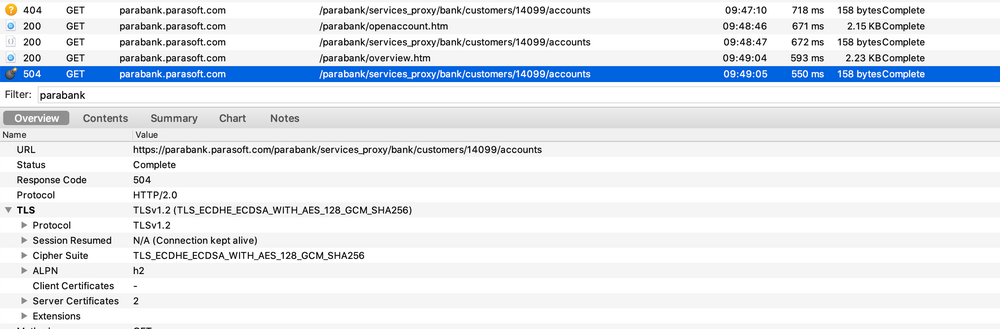
And here is how the UI renders this.
Moving forward
When it comes to knowing which error codes to test for, it helps to talk to the backend developers in your team to see which ones the frontend could get.
You can also have discussions with the team as a whole, to see which errors you are expected to support.
The above examples are just a starting point to give you an idea of how you can go about checking how various error codes would display.